Showing posts with label Samurai. Show all posts

Monday, January 25, 2016

Cancon 2015

Packed and ready to go
Once again I made the journey to Cancon and like last year took the whole family and made a little holiday of it.  I entered both my 54mm Knight and Samurai that I have been working on during last year.  Didn’t win any prizes, but the judge that I talked to last year remembered my 54mm El Torres figure and was very encouraging in his feedback.  Always nice to be told that what you did this year was marked improvement from last year.

Still need to work on my blending and still need more light into the top of the figures.  The fact I made sure everything on the Samurai base was off square (i.e. the wall,road,etc weren’t in parallel to the sides) was noticed as was the effort spent on the wall.  Got some good tips for shading yellow (use crimson for the darkest shades) and some general painting tips.

Lady on a bench
My daughter entered her “lady on a bench” figure and was awarded a certificate and got a Cancon dice (something all the junior entries get which I consider to be an excellent idea).  She was well proud and had a big smile for some time.


The second hand stall was a bit of a let down.  I estimate there were over 100-150 people lined up so by the time I got in wasn’t much that I wanted.  Note there were plenty of bargains to be had, just nothing that I was after.  So given that I don’t really buy 28mm figures anymore the swag bag was pretty light on.


- Burfitt Tools drilling jig - $25

A special holder for odd shaped items (e.g. roundish things) for drilling.  Just liked it and not a thing you can easily find.


- Burfitt Tools tweezers - $10 each

Some very nice fine tweezers to replace the $2 store ones I have currently.  Time to make some more trees one leaf at a time.


- Field Tool Shop 1/35 - $5

Second hand store purchase.  At $5 happy for that to go into the spares box.


- Soviet tank crew, winter 1943-45 - $5

Second hand store purchase.  No real need or use, just felt I had to buy at least two items from the bring and buy.


- General Stanislaw 1/35 - $5

I very nice 1/35 resin figure from Scribor miniatures.  Great pose and a good face so purchase just for painting.


- 6 Secret Weapon pigments - $12

These were on sale at $2 each.  So grabbed some lesser used colours just because I could.


- Victorian fence - $15

From The Combat Company store.  They never seem to have these in stock when I visit so I grabbed one.  Very nicely the kids each got a glow in the dark d20 as well.


- 3 Reaper Bones figures - $15

Two for the daughter to paint, one that the wife liked and wants me to paint for her.

That was it.  The problem with only painting a handful of figures a year is that I don’t really need to stock up on figures or supplies like I use to.  I’ve got more 1/35 scale bits than I will ever get through, lots of 54mm stuff and still all the old 28mm Ral Partha figures in case I get bored.  And Dungeon Saga if I get really keen.  A bit sad that the days of mass purchasing are over, well at least until the kids get into some new army game :)

Sunday, January 17, 2016

54mm Samurai finished

54mm Samurai
I made it.  A week before Cancon and my 54mm Osprey Men-at-arms Samurai is done.  Over the last week I finished off the details on the three yellow circles on the back which turned out quite nice.  I’m wishing that it was on the front to be honest.  I then did the usual few nights of poking a things which didn’t really need any work as it’s hard to stop.  But you have to, otherwise you end up ruining something by mucking around without any real purpose.

Side shot

Once the figure was glued onto the base (using two part epoxy glue) I did a quick tidy up to cover the glue and then blending the ground and the figure with some pigments to get a more soil like look.  I used some dark browns, light browns and black pigments dry and went for the “less is more” approach to avoid the ground becoming over worked.  Dry pigments make things look very dull and flat.  Great for dusty tanks, but on figures can kill all of your paint work and make the entire thing look very bland.

Lovely rear design

With two figures done I did a test fit into my new carry case and now I’m all ready to go.  I just have to wait a week.  Now for all those pesky 28mm figures that are sitting in the background and need to be finished off to satisfy the completionist in me.


Saturday, January 9, 2016

54mm Samurai finishing parts

Quick post as I have to get back and do some more painting tonight hopefully.

Almost done
The naginata was glued in place (with 2 part epoxy glue) however some paint on the handle was scraped off so that area had to be primed again.  I first tried painting the handle in a light brown (VMC German Light Brown) but after shading it just looked like a tube, not a wooden handle.  So that was scraped and I went for a more bamboo wood look.  The base coat was a tan yellow with darker brown (VGC Bestial Brown) used to mark the bamboo segments.  An off white was used as the gradual highlight to try and represent some wood texture.  It breaks up the handle quite well and avoids the tube look previously done.

The metal blade on the naginata was highlighted up with VMA Aluminium and shaded down with VMA metallic Black and straight black.  Probably need to pop the contrast a bit more on this.
Start of the back design
I started on a design on the back as it was looking a bit plain.  I liked the idea of three yellow circles in the same colour as yellow trim on the front of the figure.  In the picture is the base coat down with more shading to occur.  The shade/highlight colours will be the same as the rest of the yellow on the figure.

Base completed
On the base the gap between the wall and the ground was puttied up and painted up to match the ground rocks at the front and plain black at the rear.  So the base is pretty much done.

So final push is finishing off the back design and the last few tidy up areas on the figure to make sure there aren’t any over paints, etc.

Sunday, January 3, 2016

54mm Samurai base work

I hope everyone had a merry Christmas and survived the new year parties.  I was off visiting family interstate for the last two weeks so all painting activities took an enforced break.  However just back and I cracked on with some of the base work for my 54mm Samurai figure.

Samurai base work
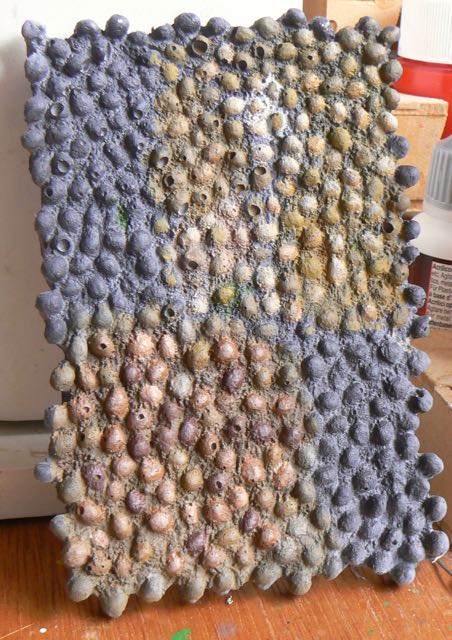
Cobblestones
I think I finally got the cobblestones the way I like.  I went for a very dark brown for the dirt colour and darker greys of the rocks with a few odd red/ochres for variety.  To tie the ground to the wall a filter of dark green/brown was done over all the rocks and dirt once the highlighting of the rocks was completed.  I wanted the ground to be quite dark so the much more colourful and brighter figure really pops.

Reeds and bushes
For the grass area on the side I first painted it with a dark olive green (Coat d’arms Russian Green) and then covered this with various scatter materials in the darker green/olive colours.  I also make up a few reed bushes to add some height variation.  Holes were drilled into the ground for these bushes to be mounted in.  Also I added a few brown grass tufts.  Again trying to get a wide variation of the ground cover.  When the glue is all dry I will paint the reeds and grass tufts to add some natural colours (e.g. the grass tufts having bits of green and yellow in them rather than being all brown).

Strangely the green doesn't really show
On the wall I finished the oil blends on the rocks and then did an overall filter of dark olive green with a second, heavier coat of the olive green down the bottom of the stone work.  I’m trying for a very wet and slimy look to the wall and ground.  Also I want both the wall and ground to be quite drab so all the attention is on the figure.

Of the figure, I need to finish up the naginata which I will do once it is glued in place.  The basic shading/highlighting is done but there will definitely be some scraps getting it into place.  I have to be very careful not to snap off the arms when forcing/assisting the naginata into place as they are just glued and not pinned.   Still thinking about doing a pattern on the back of the figure.

Finally I repainted the base in the gloss black to hide any bumps/scuffs that have occurred along the way.

Sunday, December 13, 2015

54mm Samurai arms and display base work

Serious air guitar
Well despite the Xmas silly season being well underway and a late night party that became a early morning party good progress was made.  This is my last weekend as the next two are out with holiday activities so definitely into the business end of getting this figure done.

Putty work
Repaint done
Both arms were glued on (using two part epoxy glue) and the gaps puttied up.  It’s a bit odd after a few months of seeing the figure without any arms.  He suddenly looks a lot squatter.  After 24 hours the putty was undercoated and again left overnight to dry.  I was a bit worried about trying to blend the new sections back in with the rest of the figure but it worked out to be easier than expected.  I think this was because both sides of the arms where the putty was were in the lighter sections and the highlighting up was easier than the shading.  I found that the first two coats of paint over the undercoat had to be thicker than normal but after than the blends were as normal.  Also I made sure when I was blending in the new section that I blended over some of the existing painted section as well.  This overlap would help hide the new paint work, as you will never get a paint mixture exactly the same as the first time you did it.

New wall
On the base I painted up the wall section much like my test piece from earlier.  On the test piece I also started trying out some oil paint blends and washes to see if that improved things much.  It did a bit, but I also want to do a little bit of pigment work too while I have the chance as the test piece and the real piece are very close.  I’m pretty much sold on always doing test piece for terrain bases going forward.

Many trials, lots of error
On the cobblestones still no luck.  Many attempts but all don’t really seem to work with the rest of the piece.  I’m currently trialling a very light dirt/mortar colour with the rocks being the same range of greys that make up the wall.  Hopefully next week I’ll get this sorted out.  Also I need to complete the naginata.

Sunday, December 6, 2015

54mm Samurai arms and Dungeon Saga homemade case

This week was arms, a wall and a whole lot of styrene card and glue fumes.

Arms
First up I worked on the arms of my 54mm Samurai.  Using my new green colour scheme of using VMC German Uniform Green as the shade colour (with some VGC Night blue for the final shades) for the Jade Green base coat worked a lot better.  The figure does have some limitations.  The arms have a pitted surface (deliberate, not bad casting) to represent a cloth texture.  However it just looks like someone stuck a pin in the putty while the figure was being made.  I know, I’ve done the same and this is exactly what it looks like.  Never a good look, just comes off as poor sculpting.  Odd as the gauntlets are really well done.  So it just detracts from the figure somewhat.

Glove love
The gauntlets I base coated in VMC Beasty Brown and shaded down with VMC Smoke.  The highlights were done in VGC Khaki and VGC Dead white.  I was really happy with the gloves.  I never get brown highlighting right but this time things came together and in a very small area (3mm x 3mm) I got some great blending and real contrast.  Pretty chuffed to be honest.

Next will be the naginata and then glue time and tidy up.  I might just make Cancon.

Base colours on the wall


At night I blocked out the base colours of the wall section using 4-5 different greys and some high impact (i.e. different from grey) colours.  After all the stones were done I did the pointing in VMC Tan Yellow.  My only problem is with so many greys when I was doing the second coat I’m pretty sure I mismatched the second coat compared to the original.  I’m going to call that deliberate as it add more variation.  Next step is to start the shading work and there are a lot of stones to do.  Gone are the easy days of 28mm terrain and the quick two stage dry brush.


Flat card + glue = box
Now that I have my Dungeon Saga kickstarter I need something to put all the figures in.  The game comes with a cardboard slip case and the wife mentioned I should make a box to go into the the slip case to hold the figures.  I needed something light so I got some 1mm styrene card and some styrene square tubing and made up a box to fit the slip case.  The square tubing is used in the corners and on the bottom as reinforcing.  I cut a hole in the front so you can put your finger in and pull out the tray.  Since these pictures I’ve undercoated the whole thing black ready for some final colour (undecided as yet).  Now I need to find room on the shelf to put it.
Like it was made for it

Sunday, November 29, 2015

54mm Samurai socks/sandals/green armour and basing trials

Well I got cracking for a few days, then work hit and knocked me out for a few days but I picked up over the weekend.  So in the end on par.

Skirts and sandals
So firstly I tidied off the green armour skirt and finished off the green shading and highlighting.  Need to work a bit more on the two small reliefs on the armour pieces as they are currently gold but look a bit muddy.  The moulding isn’t great however.

Secondly was the socks and the sandals.  These normally seem to be white or off white so I started with VMC Light Sand and shaded down with some VMC Smoke and highlighted up with VGC Dead White.  I did a number of glazes on the toe area and on the ankle bones to make them the whitest part of the sock as they would be stretched the most.  The sandal straps I did in VMC German Black/Brown highlighted up with lighter brown colours.

I didn’t get to do the diamond pattern on the back yet.  I’m thinking I will do the arms first before attempting this.  This is because if I muck it up, there will be a lot of rework to fix it up.  Not sure I have the time for that.  Plus I’m scared of ruining all that lovely shading work I’ve done :)

Wall trial
I haven’t worked much on the display base yet so I started some trials on both the wall section and the road section using spare pieces.  For the wall I’ve pretty much settled on using five different grey shades with off white/white pointing.  The grey rocks are in a random pattern to try and make it look like these are just random stones but they came from the same area/quarry.  I did a number of brown shades all over and some dark green (Coat d’Arms Russian Green) down the bottom as water seepage/slime.  That was looking ok but not good enough.  So I went back and using some glazes highlighted and shaded each rock to try and get some more variation.  The good thing here was that since each grey shade was quite close to the other it was a case of the highlight of one grey rock was the shade of the next lighter rock.  Once that was done some more brown glazes to blend things back together.  My idea was that each rock would have been a different colour, but all would have been in the wall for the same time so “dirty” effects should be constant over all the rocks.

For the rock pathway I started with a base of VGC Earth and then did a number of red brown/brown rock colours.  It looks ok, but doesn’t really match with the wall.  So I’ll need to try that one again with more greys.
Many trials, nothing usable

Finally my daughter started on her entry for the Cancon painting competition.  She likes the idea of painting but only likes to do 20 minutes at most and is a little intimidated by what I’m painting.  Ie what she paints doesn’t look like what daddy does so she feels like giving up.  So I need to push her a bit but don’t want it to become painful.  Also I forget she has never seen me paint much so hasn’t seen the progression of my figures that much.

So orange
Currently she is painting up one of the G scale gauge (1/24 - 75mm) figures I purchased off eBay of a seated lady.  Luckily my Dungeon Saga kickstarter came and has some nice benches that fit the scale quite well.  So it will be a lady in a park (read lots of railway scenic flowers) sitting on a bench.  Lets hope we get there.

Sunday, November 22, 2015

54mm Samurai one step forward, two steps back

New armour skirt colours
This week was a bit of going backwards to hopefully go forwards later.  I had another go at the lower green armour pieces.  These have small square recessed areas that I’m really struggling to get to look decent.  I tried base coating the entire piece again and having a go at shading with using VMC Hull Red as the shade colour to the Citadel Jade Green.  However it just didn’t look good.  The recessed areas make glazing near impossible as any wash/glaze pools in the recessed areas and the small size means the paint won’t stay on one side of the small recessed square area, but instead spreads out over the whole square due to the surface viscosity of water.

So I needed a different approach.  I decided to make the recessed squares a different colour, going with the purple of the main coat to tie the front and back of the figure together.  Also I went away from glazing the recessed areas and used old school army painter layering to build up the highlights.  I managed to get the shades in by holding the figure upside down the entire time I was doing the shade washes so they would dry in the right place and not spread out.  Also I didn’t worry about being too neat as once I had finished all the squares I redid the green areas to neaten things up.  It’s starting to get there now.  Next is redo (again) all the green shading/highlight and making sure I don’t get any seepage into the recessed squares.

Scabbard done again

I tried doing a diamond pattern on the scabbard but didn’t get it even enough.  So the entire scabbard had to be repainted.  I like the diamond pattern idea but will need to be more careful and accurate next time.  I’m also thinking of using a pattern of four small diamonds to create a larger diamond on the back of the figure.  The large back area needs something on it to fill in the blank space.

New belt
Other bits finished off was the horse hair on the helmet from last week and the waist belt.  For the helmet hair I kept alternating between adding dark blue for shades and shadows and dark brown glazes to keep the dirty animal hair aspect going.  I kept the grey highlighting very muted to avoid the “I dry brushed the heck out of this” look.  The belt I wanted something to break the dark breastplate from the tan of the skirt.  Also I wanted a bridge between the yellow lapels.  I went of a base colour of VMC Light Sand which was highlighted up with VMC Gloss White and down with some brown.

Next week will be finish the green armour, diamond patterns and sandals.  Then the arms can get glued on.  The race to get this done by January is on.

Sunday, November 15, 2015

54mm Samurai coat work, leg armour and hair

54mm Samurai
Most of my painting this week was on the kids go-cart painting “go fast flames” on the side with enamel paints and my old Paasche model H airbrush.  I learnt that it is much better to mask an area and then cut out a pattern with a hobby knife (which means you get nice smooth curves) than try and mask out a pattern with tape (which results in odd dead straight sections and wobbly curves).   Enamel paints are lovely in that you have ages for them to dry and can clean up any rough bits with some white spirit and a cloth.

On the samurai front I did some more work on the purple coat and tried to smooth out the transitions a bit more especially around the top of the coat where the highlights get more extreme and go towards white/pink.  I’m happy with the coat but will need to do some more work on it once the arms are attached and I can see where any extra shadows are needed.

The leg armour was next.  Seeing that these are very much in shadow under the armour skirt I started with a base of VMC Hull Red and shaded down with VMC German black/brown and a hint of VMC Midnight Blue.  This is because things get bluer as the light fades at dusk.  So for things in shade you normally add blue to the mix.  This is an area I need a lot more skill in.  I’m still in the simple school of colour mixing.  I notice when watching painting tutorials experienced painters mix a wide range of colours when highlighting and shading.  Half the time I’m questioning why, as the colour added can be totally different from the base colour.  Much learning needed there.

Better blends on the coat
For the leg armour highlights rather than go with the purple I used VMC Flat Yellow to try and give a more sun faded/worn look to the raised vertical slats on the armour.  That worked out ok.

Finally started (again) on the horse hair “hair” on the helmet.  I’m keeping with a brownish shade to keep things away from the land of grey scale that I tend to end up in when painting black/grey items.  I did try and highlight with a bit of yellow but the blue in the grey paint started to make things green.  So I need to try countering this by adding red.

This reminds me of painting books I read where grey is always mixed from colour opposites and black is always mixed from the three primaries instead of a pre-created (i.e. from the tube) grey or black.  I’m starting to see where this could be of value.


Sunday, November 8, 2015

54mm Samurai armour and coat work

54mm Samurai
This week I tried working on the green armour pieces at the front of the figure.  I didn’t have much success.  My original shading colours just didn’t work.  The armour is covered in small recessed squares that are throwing me off.  Every glaze ends up running into them and makes a mess of things.  Instead I started to try and shade each square individually.  As I wanted the shadows on the top of the squares (as the recessed nature of the square means the top area is in shadow) I found it was best to paint upside down to stop any running of paint down the figure due to gravity.  Currently it’s all a mess so I think I’ll have to start it again.

54mm Samurai
After putting the green in the too hard basket I worked on the purple coat.  I though this was going to be a bit daunting but it worked out pretty well.  I also figured that the green was all sorted and easy too, wrong both times.  Using VGC Hull Red as the shade worked well but I also took it down a notch further than originally planned right at the base of the coat.  The Hull Red glaze over the purple ends up almost black/brown.  The highlights up with Fluro Magenta worked well but I needed to add some VMC Gloss white to pick up the shoulders to match the tonal levels of the yellow lapels.  I messed up one glaze and ended up with a watermark line which I need to glaze/paint out now too.  Seems to happen when using white and not being super careful.  Maybe it’s just the gloss white, not sure there?

Look mum, no arms
So I need to work on the purple some more but it’s definitely heading in the right direction.  The green, ugh.  Need to experiment and try something different.  I think my colour planning work was ok, but the recessed areas are much trickery than I thought they would be.  Still have the helmet hair, sandals, socks to go.  Also the lower leg armour and yellow leggings need some work too.  But at least I worked out where on the base the figure will go and have drilled out the mounting holes.

Sunday, November 1, 2015

54mm Samurai and first Mantic Dungeon Saga figures

Wooden skirt work
Poked along a little bit this week with my Samurai as I only got to do painting on the weekend.  I spent a couple of hours working on what I thought was his hair until it was pointed out to me by the wife that the figure didn’t make sense.  If the top of the head was hair, how did the bottom armour cowl attach?  A quick google search of the original drawing (and reading the painting notes that came with the figure - doh!) pointed out the ‘hair’ was not really hair.  I was part of the helmet and made of horse hair to look like normal hair.  Sigh.  So need to repaint that to look more horse hair and less person hair like.

Helmet detail, sorry bad lighting
The next session was working on the wooden armour on the front skirt and rear of the helmet.  I base coated these in VGC German Pale Brown and shaded down with VMC Earth.  Then I did half a dozen highlight glazes using first VMC Iraqi Sand and then VMC Light Sand.  The problem I was finding is that the armour is sculpted as a series of sticks.  So any glaze quickly runs into the recesses between the sticks making the recessed areas the lightest.  Not what was wanted.  To overcome this I ended up glazing the highlights and then going back and doing a very careful re-shade with VGC Earth.  Finally I did some point highlighting with the VMC Iraqi Sand/Light Sand.  I found that it was much better to do the stroke as very small up/down strokes rather than painting across the edges in one long line.  This was due to the paint building up on the edge only rather than across the whole area and although the amount of paint being put on was the same having the strokes follow the pattern of the wooden armour helped bring out the detail much better.  Or to put another way paint the object as an individual (i.e. paint each armour stick as a stick) rather than a blob.  Which is odd as painting hair is pretty much the other way round to avoid the old school dry brushed hair technique look which results in hair that looks like painted straw, rather than the gentle colour transitions that occur with real hair.

Base together with wall section

On the base I drilled and pinned the wooden core that makes up the wall section.  This is give some extra support so the wall doesn’t get snapped off accidentally.

Dungeon Saga Troll
During the week my first parcel from Mantic of Dungeon Saga arrived.  This was the Orc expansion “Warlord of Galahir”.  The figures are much better than I expected (based on figures I have seen in Doom and “A Touch of Evil”).  They are almost too good of a quick bake base coat and magic dip paint job.  However I don’t have time currently to paint 80 odd figures for a game I’m not going to play that much.  I mainly backed the Kickstarter for the occasion game day with friends and for the kids when they get a bit older.  So I will probably just paint some of the character figures when they arrive for now.

Dungeon Saga Mawbeast


Sunday, October 25, 2015

DIY scatter flock, 54mm Samurai and more resin casting

Milliput ground effects
 A mixed bag this week.  I was a little light on painting due to illness but managed to do a wide range of other activities.  First off was doing some of the ground work for my 54mm Samurai.  I used some Milliput and filled out the blank area on the base.  Just some gentle ground variations to make it a little less boring.  Then I filled in the cracks between the resin cobblestone piece and the wooden base with the leftover Milliput.  I also painted up the back of the wall piece in good old flat black.

Next up was some mold making and resin casting.  I made up a couple of molds for some pots I had purchased recently as I wanted quite a number of them for a market diorama I have in the back of my head.  Also using the left over Pinkysil silicon I did a quick mold of a tree piece I had made but didn’t use for my 54mm Prince of Novograd.  This was pretty much the case of “got left over silicon, quick find something small in 1 minute to make a mold”.  The macro shot shows what amazing detail you can get out of a home cast.  It will make a great fallen log on a base.

Resin log love
As my wife prepares for the next cosplay adventure I’ve been spraying various toy weapons to make them look less toy like.  Many plastic swords are now black and/or gunmetal.  I even got break out my old Paasche model H airbrush as the larger nozzles it has are great for mass coverage of larger items.

DIY scatter/flock

Many moons ago I saw a youtube video made by RubbishInRubbishOut about making your own flock/scatter material out of sawdust and cheap acrylic paint.  Having done a large amount of woodwork recently I had some sawdust to play with.  First I used some flyscreen and sifted the sawdust to remove the big chunks.  Then using the cheapest paint I have (the $2 for 100ml type from the discount store) I added just enough water to make it liquid.  Then I just kept adding sawdust and mixing the two until there were no more clumps of paint.  I found that once the sawdust doesn’t feel wet to touch you are pretty much at the right ratio of sawdust to paint.  Any more and you end up with bits of sawdust that don’t get coloured.

To be honest I hadn’t really expected it to be that easy or to work so well.  I made up five batches just to experiment.  The beauty of this is that you can use just a tiny amount of paint and only produce a small amount of coloured scatter.  No more buying a huge bag that you will never use.  Mind you I already have those huge bags so this was more an exercise in producing odd colours of scatter to add some variety to the basing materials cupboard.  Any colour of scatter I like now.

54mm Samurai
Any finally, I got a bit of mr samurai done.  I put a hold on the breastplate for now.  Not happy with it but sick of doing it.  I worked on the yellow areas a bit and they are tracking ok so far.  The shades down are reasonable and I need to work the highlights some more.  The ankle areas aren’t right so I will need to have another go there.  But in all the yellow worked better then I expected given how little I paint yellow.

54mm Samurai