Showing posts with label Amy Johnson. Show all posts

Sunday, October 23, 2016

Amy Johnson bust part 4 and Dungeon Saga

So a bit of fiddling this week on the Amy Johnson bust.  I did some experiments on trying to do some sky reflection painting (i.e. where the sky is reflected in glass) and they went ok.  Not great but I decided to try this out on the googles.

Googles underway


I used VMC Light Turquoise as the base of the sky reflection and shaded down with VMC Dark Sea Blue and up with white.  Kind of got the look but not that well.  Might have another go later.  I also did a gloss varnish coat on the googles too.  I might do a few more and see how they look (perhaps with glazes between coats).  The rim of the goggles were painted in metallic colours (AP Plate mail and VMA Aluminium) and the washed down with VMC Smoke.

Pretty close to done


I shaded down the bottom of the bust a bit more and did various touch ups around the place.  Nothing major, just fiddling really :)

Base ready


The base is ready too.  A pine block stained a red/brown with the usual green felt glued onto the bottom.

Finally I glued in her head and redid the black on the back of the figure and I’m close to calling her done. Maybe have another go on the google and then glue her onto the base.

Skeletons!
While waiting for glazes to dry I started on the base coats of a few more Dungeon Saga skeletons.  My plan is to just keep knocking off these figures a few at a time in between other projects.

Sunday, October 16, 2016

Amy Johnson bust part 3

I got another few good nights in painting this week so some good progress was made.

Amy Johnson bust
I started on the leather jacket after my trials on a test figure last week.  Although I started with a colour plan in the end I kept changing and adjusting mixtures and adding in new glazes constantly.  The first plan was

* VMC German Pale Brown (1/2)
* VMC Dark Fleshtone (1/8)
* VMC Medium Fleshtone (1/8)
* VMC Iraqi Sand (1/8)
* VGC Dead White (1/8 or less)

These were the base colours.  Highlighting up I added more Iraqi Sand, white and VMC Light yellow.  Things got chalky, so I added in more glazes of the original base.  I also used the old Citadel Brown/Purple/Black inks as glazes. Brown ink all over a few times, purple and black in the shadows.  VMC Dark Sea Blue was also used for the shadows.  I went back and forth at least four times going too far in the highlights, trying to reglaze to bring things back, add more shadows, etc.  Finally it started to come together.  I still have trouble doing light highlights without things going chalk like.  Although you can’t see any of the inks, they did make a difference.  However my old inks are near gone (some being 10 years old) so I’m going to have to find a new supply.


As a final touch the jacket I added a number of random colour spots (some darker, some lighter) all over the jacket.  These were very thinned down to make almost little stains.  This was to give the jacket some more texture and make it look more lived in.

After the jacket the fur looked much too cool in colour so I did a number of glazes in yellow and tan to try and ‘warm’ up the fur.  I think I need to go back and get some of the highlights back.


Next was the flying cap (tis was a good week of painting!).  More brown so I had to make sure it was a different brown.  I also needed to make the wear points much lighter than the base colour and have them on the fold/scrunch areas.  Luckily I still have my grandfathers flying cap so could check that out for reference.  Either the cap shrunk or he had a very small head as it doesn’t fit on me at all.

Colours for the cap were

* VGC Charred Brown (1/2 base)
* VGC Leather Brown (not the VMC Leather brown) (1/2 base)
* AP Black (shadows)
* VMC Dark sea blue (shadows)
* VMC Iraqi Sand (highlight)
* VMA White (highlight)
* Citadel Brown Ink - wash
* Citadel Purple Ink - wash
* VGC Khaki - goggle strap
* VGC Parasite Brown - goggle fur


The Charred Brown is too cold so the Leather Brown mixed in and gave a base colour that matched the jacket in colour temperature.  Again the brown ink was used as a wash a few times to add some depth to the material.  I went too far again with the highlights so had to redo the edges of the highlights (there were too harsh) and soften them down.  I used the purple ink to colour the creases of the top of the cap.

On the strap of the goggles I did a number of vertical lines in a lighter colour and then white to try and show that the strap was a type of elastic type material that was bunched up.  I also added some much darker lines to add to this.


The goggle fur was heavily washed down with charred brown and black and highlighted up by adding in white to the parasite brown.

I haven’t done the lens of the goggles yet.  Need to work out if I’m going to try the light blue (i.e. sky) look with a light spot that seems popular in 28mm or go for the layers of transparent colours and vanish technique that seems to be used in larger scale figures.  So some experiments first.  The goggle lens are quite recessed so there is plenty of depth to play with if I go for the layers technique.

Lastly I did some more fiddling on the face and changed the eyebrows a little (making them more sculpted and tried to add the light dots to the eyes.  One was good, the other so so.  Had to stop today as my eyes were just fuzzing out and couldn’t do it any more.  Also I did the lips.

Sunday, October 9, 2016

Amy Johnson bust part 2

So this week was all about Amy.  I first redid her eyes.  I had tried for a hazel (ish) colour and that hadn’t worked out.  So I repainted them in a light blue (old Citadel Lothern Blue).  However I kept missing on the left eye and messing it up.  The resulted in a very lumpy looking eye.  In the end I scraped off the paint back to the resin and started from scratch.  That worked a bit better.  Still not as good as the other eye which I just fluked.

New eyes


For her flesh colour I’m trying a mix of

* VMC Violet Red
* VMC Beige Red
* VMC Flat Red
* VMC Light flesh (the main base colour)
* VMC Light Yellow
* VGC Dead White

Lots of glazes, lots of layers.  Seems to be working out so far, but she may still be a bit too pink.  I’m leaving the face for awhile now until the rest of the figure is done so I can tone her face in with the rest.  Keeping the glazes very diluted and trying not to rush and make any colour steps that are too much.

Fur collor


For the fur collar I wanted a dark brown.  This will also make the much lighter face pop some more.  My colours for this were

* VMC German Black/brown - base
* VMC Leather Brown - base
* VMC German Pale Brown - highlight
* VMC Brown Sand - highlight
* VGC Dead White - highlight
* VMC Dark Sea Blue - shadow
* AP Black - shadow


The base colour was a mix of 2/3 German Black brown, 1/3 Leather Brown. Rather than painting totally over the highlight areas instead I selectively highlighted on the tops of the fur ridges multiple times.  This layering gives extra bulk and texture I find.  The shadows were more of glazes under the folds with the most extreme highlights on the tops of the folds.  Also around the face area at the front of the fur I took the highlights to the highest to be closer to the lightness of the face and also to draw the eye more to the face.

Leather jacket trial on the right

Lastly I started doing some trials on the leather jacket.  I think for this scale I need to have some real sheen to the leather.  So I’m experimenting with my old Citadel Inks (Brown, Black, Violet - in the hexagon bottles).  These haven’t seen daylight for a number of years but are still usable.  The ink dries very glossy to satin.  On a test figure I did some experiments and am starting to get the look I’m after.  I found trying to highlight after the base coat doesn’t work so well.  Instead I found pre highlighting the figure and then applying the inks worked better.  The highlights are better and smoother.  Again pre-shading working well.

So on the real figure I’ll start with a very light base coat, highlight it up to near white as appropriate and then start the ink washes.  The violet ink also worked quite well in the shadows.  All the inks are being applied diluted as straight out of the bottle they are way too intense and glossy.

Monday, October 3, 2016

MOAB 2016, Dungeon Saga and Amy Johnson bust

Sorry for the irregular postings, been away on holidays.  Should be back to regular weekly postings for awhile now.

It’s that time again for MOAB and the joy of the Bring and Buy store.  Last year was great so I had high hopes again.  This year the store was in a larger location (at last!) so there was room to move and breath.  Unfortunately my hopes for new toys were dashed.

There were lots of good things there if you were into 28mm armies, both fantasy/scifi and histories, but I’m not anymore so pickings were slim.


- Afrikakorps in action - $6

Lots of nice black and white photos for reference


- The American Plains Indians - $5

Light reading and some good colour plates as always


- A4 resin flagstone road? - $4

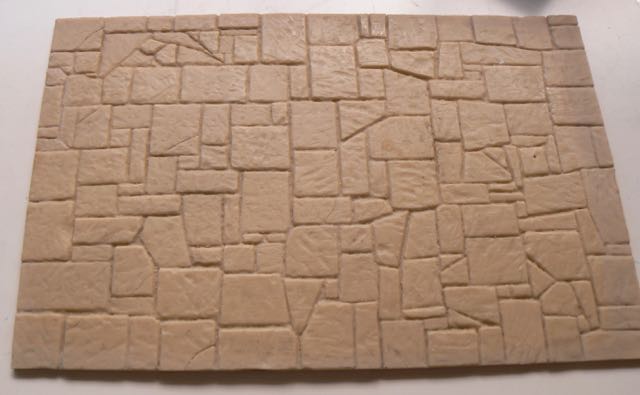
I huge A4 size flagstone area made out of resin.  No use for it, but couldn’t resist at $4.  Might even make a cast of it.

That was it :(  No cool 1/35 or 54mm figures this year (or someone else got them).

Dungeon saga skeleton archers
I finished off another three skeletons for Dungeon Saga (in the picture I’ve still got to finish the bases).  These are just a slow burn project when I feel like doing some quick and dirty painting.

As my Violinist diorama is so big, it doesn’t fit the carry case I made last year for transporting figures.  So I spent too much of the weekend making a larger one for dioramas.  Don’t make boxes when you are dead tired.  Took twice as long and lots of silly mistakes which cost time and wasted wood.  Anyways it’s finished now.

Amy Johnson bust - primed


Finally today I started on the Amy Johnson bust.  Never done a bust before or even a figure at this scale.  Being female I’ve got to avoid my usually extreme ‘weathered outdoor man’ face look and keep things much smoother (very hard at this scale) and lighter/paler.  The good thing is there is less to paint and really only four areas on the bust.  The face, cap, fur collar and the jacket.  So at least I only need to work out 4 colour mixes.

Starting the face


Saturday, July 9, 2016

Violinist diorama base work part 4 and other distractions

This week was trying to make a marble effect on my fountain piece work.  I think I’ve almost got there.  My colours used were

* VGC Bonewhite - base
* VGC Khaki + Base - first darker marble streaks, second darker lines made my adding more Khaki.
* Above + VMC German Pale Brown - alternative dark lines
* VMC Sand light + base - first lighter streaks
* Above + VGC Dead white - second lighter streaks

Marble fountain
All of the above mixed with Winsor and Newton flow improver and diluted with water to make the lines as thin and smooth as possible.

Using the flow improver was the key.  It breaks down the surface tension and allows the paint to be put on very smoothly and near transparent.  Most streaks were done by repainting the same line repeatedly.  When the paint was going on for the first time the colour change was barely noticeable.

I’m pretty happy with the marble.  I need to decide what to do with the fountain bowl, spout area and tiles around the bowl.  I’m thinking of coloured tiles and terracotta.  Still thinking there.

Pond area painted
I painted up the pond area and added a simple design to break up the large blue area.    I tried freehand first, failed and then used a template to make the pattern symmetrical.  Now I’m working out the prep work before the resin pour.  This involves varnishing the area (to seal it) and building up the mold box.  Then comes the pour and lots of sanding..

My new bust of Amy Johnson
I was totally distracted when my bust of Amy Johnson by Bad Squiddo Games arrived.  Absolutely love it.  So of course I spend some time prepping it and have almost finished making a display base for it already :)


Also found a small seed pod I realised that it would make a great beaten gold bowl in 1/32 scale.  I put on two coats of PVA glue to seal up the wood and then undercoated it in black.  My base was a mix of VMC Dark Sea Blue (great for taking the shine out of metallics) and AP Greedy Gold.  Highlights done with VMA Yellow Ochre and VMC Gold.  Needs a dark oil wash to bring out the “leaves” on the outside but very happy with finding that on the footpath.