Showing posts with label airbrush. Show all posts

Sunday, February 8, 2015

Badger Renegade Krome airbrush review

Badger Renegade Krome with quick connector and spare needle

Once I had decided to purchase a decent airbrush I wanted to buy something from a local physical store in case there were any issues.  Also I was finding that there wasn’t too much price difference between online and physical stores once postage was added in for quality airbrushes.

The short list was down to a Badger Renegade Krome (maybe a Patriot) or a Paasche Talon.  Both had the features I was after and were in the $150-200 price range.  I went for the Renegade Krome as the paint cup on the Talon looked a bit big.  I knew I would only be using a small amount of paint so a large cup wasn’t needed.  If the Paasche VJR had been available I probably would have gone with it due to my past experiences with the Paasche model H.

My LGS The Combat Company sells Badger airbrushes (Krome/Patriot/Sotar) and accessories.  I also purchased some Badger airbrush oil as once you are paying $150+ for an airbrush $5 for some oil is a pretty obvious purchase.

The Krome comes in a nice padded box (dense foam on the bottom, soft foam on the top) with a clasp to keep everything safe.  In the box it came with a M5 to 1/8 inch adapter which was good.  By default the 0.2mm needle/nozzle was installed and there was a 0.3mm needle/nozzle included.  A slight confusion was that the 0.2mm needle needs to be used with the end cap with horns.  However the 0.3mm needle needs to be used with the end cap without horns.  This isn’t really made clear in the instructions.  Note that you can buy a 0.3mm needle adapter kit that come with an end cap with horns.

Firstly I striped down the Krome and oiled it.  The small bottle of oil is going to last a lifetime as you only use a drop or two.  The feel of the Krome is great.  A nicely balanced weight and the pull back action is very smooth.  The paint cup is rounded at the bottom of the cup so you don’t get any paint stuck in a corner (unlike my cheap airbrush) and thus cleaning is much easier.  The nozzle isn’t screwed in, it just sits in via friction so be careful during strip down as the nozzle is really easy to lose and is the size of a grain of rice.

I used the 0.2mm needle for awhile which was fine.  I swapped over to the 0.3mm needle as that worked better when priming figures and doing varnish sprays.  For the most part I run with the 0.3mm needle and find that it works great for general coverage work.

So would I recommend the Renegade Krome to others?  Absolutely.  It works well, comes with two needle sizes and in use really feels good.  I’ve run it at from 15-40 PSI and have had no issues.   The strip down is easy but you need to be careful with the tiny nozzle.  Always do your strip down over a catchment container.


Sunday, February 1, 2015

Dynamic Power dual action airbrush review


After my success with my Paasche model H air brush I started to investigate the various types of airbrushes a lot more.  The Paasche model H was definitely an old school brush.  All the cool kids were using dual action gravity feed models now.  Given the limited availability of locally purchasing an airbrush at the time I was down to a short list of a few Passche or Badger models and various generic brands.  The generic brands were cheaper but still in the $30-50 range.  However in the back of my mind was the FUD that a new dual action airbrush wouldn't be much better than what I already had.  I would waste a fair chunk of change and be no better off.  I really wanted to "try before you buy" option.  That not being possible I looked at other options.

From the ebay store that I purchased by air compressor from they also sold dual action airbrushes ('Dynamic Power' brand) with a 0.2mm nozzle via auction starting at $0.01.  Three days later I purchased one for $2.30 plus $9 postage.  So what is a $11.30 airbrush like?

Firstly it works quite well.  It came in a plastic case with hard foam for the airbrush to sit in.  There is a small wrench to remove the nozzle which is screwed in.  Also there is a 1/8 inch to push on hose adapter and a small plastic pipette included.

The pull back action is a bit rough and the rear housing is plastic.  After the first use the nozzle got jammed up with some gunk which I suspect was there from when it was put together at the factory.  I should have cleaned it first but in my defence didn't know better.  After oiling the pull back got a bit smoother which made use a lot easier.

Using the airbrush I immediately noticed the difference from the single action Paasche model.  There was much more control on the spray.  The gravity feed was more forgiving on the paint mix and being able to easily open up the nozzle of thicker paint meant less dumping out of paint and re-thinning.  Also the top cup was easier to clean than the side siphon cup of the Passche.  Pretty much all the points that other comparisons between single action and dual action air brushes had said.

So after my $11.30 experiment I was sold on dual action airbrushes.  Now to get a decent one that would last.

Sunday, November 23, 2014

Airbrush general equipment

In an effort to give people an idea of some of the extra equipment and costs (in AUD) of getting setup with an airbrush I've made a quick tally of some of the extras that I have purchased.  Like many tools none are essential but most make things easier.  For pretty much all of them I would recommend eBay as a source of supply, especially on the disposable items.

* Glass cleaning pot - $15-20


When cleaning out your airbrush between colours you need to spray some cleaner/water/etc through it.  Rather than spary that into the air and contaminate the piece you are working on you instead spray into this heavy glass pot.  The lid has a filter on it so the paint/cleaner stays inside.  The pot also doubles as an airbrush holder.  Recommended.

* Cleaning brushes - $5


Usually sold as a set of different sizes these are small brushes to clean out your airbrush.  I don't use mine much now that I use q-tips, an old toothbrush and paint brush instead.

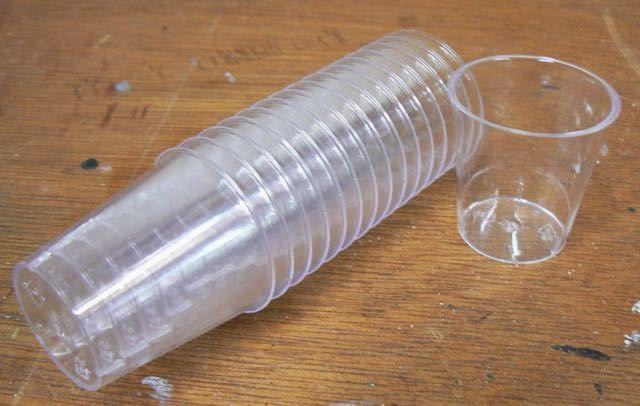
* Disposable mixing pots - $2 for 40


The clear plastic shot glasses sold in grocery stores make great mix pots.

* Q-tips (ie the things you clean your ears with)


I find these very good for cleaning out the paint cup and needle of my dual action airbrush.  They absorb the last traces of paint that always seems to be left in the bottom of the paint cup.  Buy decent ones as the cheap ones come apart and leave bits behind which will block up the airbrush nozzle.  Yes, this is the voice of bitter experience.

* Quick connector - $2-3


Handy as you can disconnect your airbrush without draining your air tank.  That way you can do a full clean or swap airbrushes.  For a dollar or two more you can get ones with a small screw dial that limits the air flow too.

* Plastic pipettes - $2-3 for 20


Great for mixing and adding water/thinner/etc into the paint cup.  At art stores I saw them for $1 each, so another item where ebay is the winner.

* Airbrush holder - $10-15


These have mounts for both normal gravity feed dual action airbrushes and other types with side cups.  Now that I have the glass spray pot I don't use this anymore except when I'm using my Paasche Model H.  Some models clamp onto a bench, others are free standing.

* Needle oil - $5


If you are going to buy a decent airbrush, best to look after it.  A drop or two of oil every few sessions is all that is needed.

Wednesday, September 24, 2014

Paasche Model H airbrush review

Olde airbrush of times past
My Paasche Model H is quite old, getting on 25 years.  It is a single action, siphon feed type airbrush.  Due to the simplicity of single action airbrushes and the well maintained condition it still works perfectly today.  It still even lives in the original cardboard box :)  It has three nozzles (0.3, 0.5, 1.0mm labelled as 1,3,5), and both bottles (big/small) and a side paint cup (which I use most of the time).  I purchased a Paasche M32 to 1/8 connector so I could connect to the 1/8 air line I have.  The connector cost $4.  Ebay is a wonderful source of connectors between all the various size connectors  that the airbrush manufacturers use.  I recommend standardising on 1/8 inch as most airbrushes have connectors to 1/8 inch and most compressors are either 1/8 inch (hobby) or 1/4 inch (garage).

My Model H being the older model gives me a bit more control on air flow than newer H models.  I can get approx a 1/3, 2/3, full control on the air flow.  Newer models seem to be much more full on or nothing.  Mind you this is in a travel of a few millimetres on the trigger so you need a light touch.

For most occasions I use the small side cup as that enough paint capacity.  There is more than enough capacity to spray a dozen or so figures for an undercoat for example.  For nozzles I found the 0.5mm size best for cheap craft paints as they tend to be a bit lumpy.  For better quality model paints the 0.3mm nozzle was ok.  For ugly paint like metal primer I use the 0.5mm or 1.0mm nozzle.

Like the majority of single action air brushes there is no adjusting the needle on the fly.  You have to stop painting, turn the needle adjuster which is on the underside of the airbrush, spray some more, readjust, etc.  Also the air flow and pressure impacts this.  So early on there was a lot of trial and error (and splattering and running of paint) until I got to a few known setting combinations that work.  Ie paint type X thinned down with Y amount of water means the needle adjustment should be turned 1.5 turns from the closed position.

The best part of this airbrush is the cleaning (very easy), ease of disassembly and the large nozzles you get with the set.  No tiny needle nozzles to drop and lose.  The large nozzles allow you to spray things you wouldn't normally (e.g. metal primer, PVA glue) spray easily.  Also if you want to put down a large amount of paint the bottles can be used (instead of the side cup).  The biggest downside is that to swap paint you have to do a fair amount of cleaning.  Disconnect and wash out the side cup, rinse and spray out the remaining paint in the nozzle, etc.  You could reduce this by having two side cups.

I wouldn't recommend this airbrush if you were only going to buy one.  The defaco standard dual action gravity feed models are much easier to use.  However it make a great second airbrush for all those jobs you don't want to use your 0.2mm fine detail airbrush for.  The robust nature of this model may make it good for a shared use environment in that it can be cleaned easily and all the parts that come in contact with paint can be removed simply.

Sunday, September 14, 2014

Airbrush dreams

I have always wanted an airbrush.  Not sure why, it just seemed like a really cool tool to paint things with.  Perhaps it was looking at airbrush art and not seeing any brush strokes or colour transition lines that influenced me.

My first attempt at buying an airbrush was a total failure.  I, like many others got conned by the cheap no-name brand single action airbrushes sold in hobby stores that use air cans.  It came in a little kit with two bottles, air line, etc for $30.  Bargain I thought.  No.  The little cans of compressed air are terrible value (around $20 each) and hell to use.  The air pressure is all over the place and you are limited to quite short bursts.  But the biggest issue was the airbrush itself.  The needle wasn't aligned properly with the airflow so the paint splattered everywhere.  The cheap plastic body of the airbrush was warped and twisted.  At that time I was using enamel paint to test which in hindsight made things harder.  After a few tries the kit got packed up and the dream was lost.

A few years later my father gave me his old (probably around 25 years old now) Paasche model H single action brush.  He use to use it for spraying stain on leather work.  It comes with a air hose with a 1/4 inch connector which didn't connect to the little air can I had so it just sat in the cupboard for awhile.  I could have purchased a large garage type compressor but given the terrible results I had previously and space restrictions I didn't seriously consider this an option.

Then one day at my local game store someone was using a small air compressor which didn't look like the normal $300+ ones I had seen for sale in Hobbyco.  That got me all inspired to have another look at the Paasche airbrush.  This was when I discovered that the cheap airbrush kit came with a 1/4 inch to air car connector so I could actually use the Paasche (via two air lines connected back to back).  Yes, I just hadn't looked at things the right way first time round.  So five minutes later I did a test spray and it worked.  Paint was sprayed, not splattered and everything was working like it should.  To reduce the complexity further I also purchased a pot of Vallejo air colour as that paint range is already at the correct consistency for using in an airbrush.  Everything was smiles.  However after 10 minutes the air can was done.  But my faith was restored and I knew I wanted to try airbrushing properly.

Not willing to spend $300+ on a hobby air compressor or $20 on each air can I did what all people do and checked out ebay.  Pretty soon I found that 1/6 hp air compressors with and without air tanks were everywhere and quite cheap (under $100).  Also all the extra bits (air lines, cleaning gear, pipettes, quick connectors, etc) were available too.  In addition the metric system seems to have skipped airbrush land and everything is still imperial.

1/6 hp compressor with 3L tank
For the compressor I wanted one with an air tank.  Having an air tank reduces the pulsation in the air line when the motor is running and thus you get a smoother flow of air.  The standard model with a 1/6hp motor had a 3 litre tank and also had regulator attached.  The motor was the same between those with an air tank and those without.  Some of the air compressors have some sheet metal around them which I suspect is an attempt at noise shielding.  Since I was going to do any spraying in the shed this wasn't much of an issue.  From the same supplier I also purchased a 10ft 1/8 inch female to 1/8 inch female air line and some cleaning brushes.  Three days later there was a knock on the door from the courier and I was in business.

10ft 1/8 female to female air line