 |
| Base red bricks. The fountain goes where the black is |
More base work this week. I finished up the sides of the wall section and finally got some paint on it. I’ve done another small trial and I think I have the red bricks worked out. I’m going to use a tan yellow colour of the grout as I was finding the white I used previously a bit too stark against the red.
 |
| New trial on the right |
I am going to have a small water feature in the front corner of the piece. Kind of a pond I’m thinking. I’ve started trialling a few water effects. First up was my old friend Liquid Gloss. I used this two part resin previously and it worked well on my river boards. I did a quick trial to see if it reacted with the foam I’m planning on using. The one problem I know I’ll have is the meniscus on the mold sides. I popped my test piece out of the mold after one day and was able to trim the meniscus off very easily. After one day the resin has set but the edges are still soft and can be cut with a knife. Now I need to wait a few more days to see if I can sand the area where I trimmed and get it nice and smooth (and clear).
 |
| Liquid Gloss trial |
I tried the Vallejo Still Water next. However like a number of people it cracked while drying. This was in a paint mix tray so there was no leakage to cause the cracking, and I was less than 3mm in depth. Ie used exactly as directed. The issue seems that the edges, being thinner, dry first while the centre is still ‘wet’. Perhaps if it was an even depth then it would be ok? However for the fountain bowl this product isn’t going to be suitable given the curved nature of the bowl.
I’m also trying the Woodland Scenics water Water Effects (I have a small amount from one of their school diorama kits. Will have to see how that goes. However the product never fully dries and items placed on top will indent. This makes me think after a year the top of the water area will be covered in dust that has settled into the water.
 |
| Pre-shading pavers |
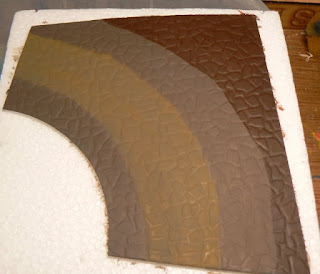
I also pre-shaded my paving stones. Each stone will be coloured individually but I’m trying to get some distinct areas. The pre shading will help with this, hopefully.


No comments:
Post a Comment